Commercial Playground Installation Guide
A commercial playground is a significant investment that requires thoughtful planning, careful execution, and a commitment to safety. Whether you’re overseeing a project for a school, park, daycare, or housing development, the process can feel complex.
This guide provides a comprehensive outline of every phase of commercial playground installation, from preinstallation planning and site preparation to assembly, surfacing, and final inspections. Transform your vision into a safe, inclusive play space that inspires wonder and serves your community for years.
Plan for Success
The preinstallation phase is your final checkpoint before groundbreaking. Confirming standards, reviewing designs, and aligning all stakeholders at this stage prevents costly delays and creates a robust foundation for a successful playground installation.
Define Your Project Scope, Timeline, and Playground Installation Cost
Before breaking ground, review the established project plan in detail. This initial step includes confirming the budget allocated specifically to the installation phase, including labor, site preparation, and any contingencies. Verify the timeline with installers to identify potential scheduling conflicts or seasonal considerations that could impact progress. Lock down the final scope to prevent last-minute changes that can cause delays and cost overruns.
A final review at this stage helps keep all stakeholders aligned before the costly physical work begins. Understanding the potential cost factors for playground installation early in the process helps you plan more effectively.
Understand Safety and Accessibility Standards
Each year, more than 200,000 children go to U.S. hospital emergency rooms with injuries associated with playground equipment. Therefore, safety is nonnegotiable in commercial playground installation. Three standards guide the process and protect children while serving all members of the community.
- Consumer Product Safety Commission: The CPSC provides national safety guidelines for playground design and installation to prevent injuries. These guidelines address fall areas, equipment spacing, and age-appropriate design.
- ASTM F1487: This standard defines safety performance requirements for playground equipment serving children ages 2 through 12. It covers structural integrity, materials, and testing protocols.
- Americans with Disabilities Act: Sections 240 and 1008 of the ADA set accessibility requirements for play areas to ensure equal access for children of all abilities.
Prepare the Site for Installation
Proper site preparation is critical for a safe and durable playground. This groundwork phase addresses everything from underground utilities to drainage systems, creating the stable foundation that encourages years of active play.
Conduct a Site Analysis and Utility Check
A professional site analysis identifies potential issues such as slopes, drainage problems, soil conditions, and existing obstructions. This assessment helps determine what modifications the site needs before playground equipment installation can begin.
Before any digging, contact 811 or a local utility-locating service to identify underground utilities, such as gas lines, water pipes, and electrical cables. Striking an underground utility line is dangerous and can lead to costly repairs, project shutdowns, and potential liability.
Clear, Excavate, Grade, and Prepare the Foundation
A stable, properly graded site is essential for playground safety and longevity, enabling proper drainage and preventing equipment settling or shifting over time.
Site preparation involves several physical steps.
- Site clearance: Clear the area of debris, vegetation, and any existing structures.
- Excavation: Excavate footings and drainage systems according to manufacturer specifications.
- Grading: Grading involves leveling and sloping the site to create a stable base.
Create Drainage
Drainage prevents water pooling, erosion, and surfacing displacement that can compromise the playground’s foundation. Installing French drains, catch basins, or grading for natural runoff protects your investment and extends the life of the equipment and safety surfacing materials.
Receive and Stage Your Playground Equipment
When your equipment shipment arrives, immediately inventory all parts against the packing list to confirm everything arrived in good condition and identify any damage or missing components. Address discrepancies right away to avoid delays during installation.
It’s also critical to store components in a secure, dry location that protects them from weather and theft. Stage equipment based on your assembly sequence to streamline installation and reduce the risk of component damage.
The Commercial Playground Installation Process
The build phase requires precision, patience, and strict adherence to manufacturer instructions. Careful planning in this stage transforms blueprints into a physical structure that will serve children for years to come.
Lay the Foundation
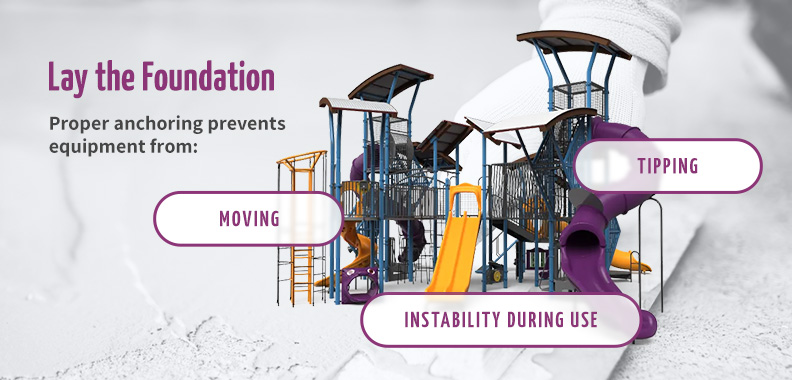
Footings anchor playground equipment. Dig to the specified depth in the manufacturer’s installation manual, and use the recommended concrete mix. The depth and size of footings are essential for the structural integrity of the equipment. Proper anchoring prevents equipment movement, tipping, or instability during use.
Follow a Phased Assembly Approach
A logical assembly process keeps the site organized and manageable. Building outward from the largest central structure maintains proper alignment and use-area spacing between components. Working in phases also makes it easier to identify and correct issues before moving to the next section.
Choose In-Ground vs. Surface-Mount Techniques
Deciding between these commercial playground equipment installation methods depends on many factors, including the equipment type, site conditions, and the safety surfacing you plan to use.
- In-ground installation: This type of installation involves embedding posts directly into the ground with concrete footings, providing maximum stability for larger structures.
- Surface-mount installation: Surface-mounting uses anchor bolts attached to a concrete slab, making future relocation or reconfiguration easier.
Assemble and Build
The directions in the manufacturer’s installation manuals for each component ensure safety and structural integrity. Deviating from these provided specifications can void warranties and create hazards. When in doubt, consult with the manufacturer or a certified installer before proceeding.
Surfacing and Inspection
Tightening the last bolt doesn’t finish the project. A few final steps are critical for creating a playground that’s safe for use for years.
Install Playground Safety Surfacing
Safety surfacing is one of the most critical components of playground installation, since falls to the surface are the leading cause of playground-related injuries.
Different surfacing types provide varying levels of protection based on the height of the equipment. Options include:
- Engineered wood fiber
- Rubber tiles
- Rubber mulch
- Poured-in-place rubber
- Artificial turf
Select surfacing based on the equipment’s fall height, maintenance requirements, accessibility needs, appearance, age-appropriateness, and budget considerations.
Perform a Final Walk-Through and Certified Safety Inspection
Before opening the playground to the public, conduct a thorough final walk through to verify that components are installed correctly, hardware is properly tightened, and use areas are clearly marked. Strongly consider hiring a third-party certified playground safety inspector to provide an unbiased verification of compliance and safety.
A CPSI audit is one of the best ways to verify that the playground meets CPSC and ASTM guidelines, which are vital for liability protection and user safety.
Create a Long-Term Maintenance Plan
A playground is a long-term community asset that requires regular maintenance to remain safe and functional. Create a documented, routine maintenance schedule to keep your safe, welcoming playground in top condition.
- Checking for loose hardware: Inspect bolts, nuts, and fasteners regularly and tighten as needed.
- Inspect surfacing depth: Monitor safety surfacing levels and displacement, and add material when depth falls below requirements.
- Examining equipment for wear: Look for cracks, rust, sharp edges, or other damage that could pose safety risks.
- Cleaning and sanitizing surfaces: Regular cleaning prevents buildup and keeps play areas hygienic.
- Documenting all inspections: Keep detailed records of maintenance activities and repairs.
Understand Your Equipment Warranty
Most playground equipment warranties cover specific components and materials for defined periods. Review your warranty information carefully and retain all documentation. Follow maintenance requirements outlined in warranty terms to keep coverage active.
Partner With Little Tikes Commercial to Bring Your Project to Life
Installing a commercial playground involves multiple phases, technical expertise, and a commitment to safety at every turn. While this guide provides a roadmap, the most successful projects benefit from partnering with an experienced team that understands the full scope, from design and equipment selection to installation and beyond.
Little Tikes Commercial brings decades of experience creating safe, inclusive, and imaginative play spaces for communities nationwide. A commitment to quality, innovation, and child development drives all our projects. In addition to getting top-tier equipment, working with us gives you a partner invested in your success.
Are you ready to bring your playground vision to life? Connect with a representative to explore how we can shepherd your project through to completion.